Develop on a feature branch (FREE)
GitLab values encourage the use of Minimal Viable Change (MVC).
However, viable changes are not always small. In such cases, it can help to set up a dedicated feature branch.
People can contribute MRs to that feature branch, without affecting the functionality of the default (usually master) branch.
Once work on the development branch is complete, then the feature branch can be finally merged into the default branch.
GitLab frequently implements this process whenever there is an MVC that requires multiple MRs.
Use case: GitLab release posts
This section describes the use case with GitLab release posts. Dozens of GitLab team members contribute to each monthly release post. In such cases, it may be more efficient to submit an MR on the release post feature branch instead of master.
In this case, the feature branch would be release-X-Y. Assuming the release-X-Y branch already exists, you can set up an MR against that branch, with the following steps:
-
Create a new branch (
test-branch) against the feature branch (release-X-Y):git checkout -b test-branch release-X-YYou should now be on a branch named
test-branch. -
Make desired changes on the
test-branch. -
Add your changes, commit, and push to the
test-branch:git add . -
Commit your changes:
git commit -m "Some good reason" -
Push your changes to the repository:
git push --set-upstream origin test-branch -
Navigate to the URL for your repository. In this case, the repository is
www-gitlab-com, available athttps://gitlab.com/gitlab-com/www-gitlab-com.If needed, sign in to GitLab. You should then see an option to Create merge request:

-
After you click Create merge request, you'll see an option to Change branches. Select that option.
-
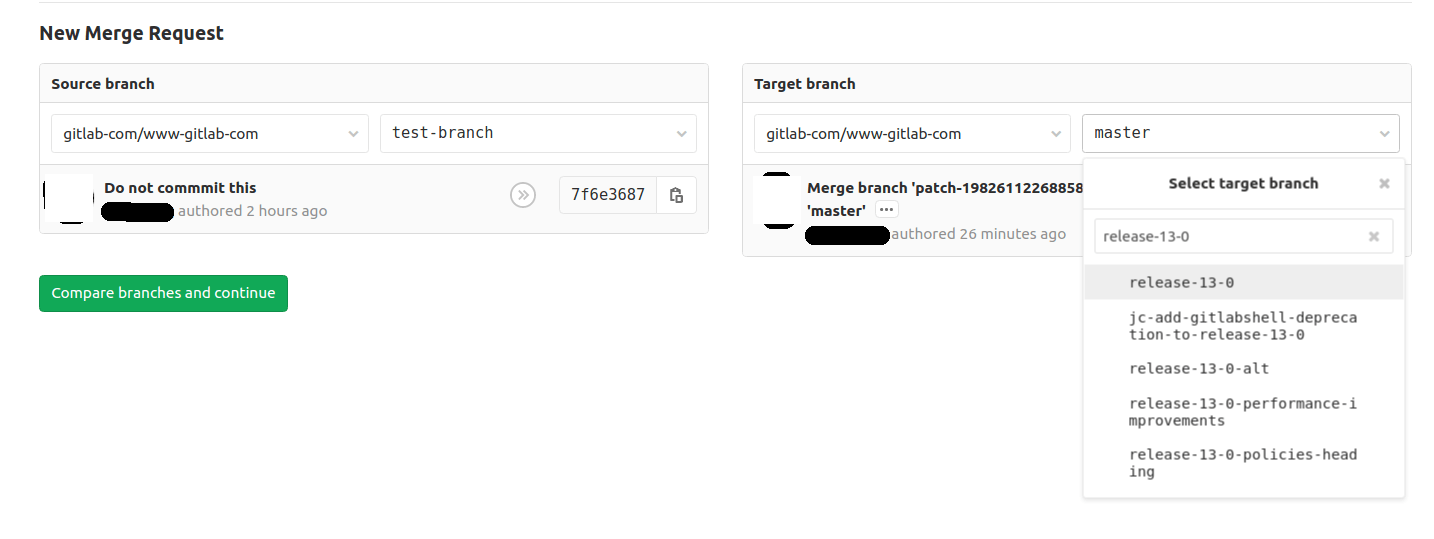
In the New Merge Request screen, you can now select the Source and Target branches. In the screenshot shown, we have selected
test-branchas the source, andrelease-13-0as the target. -
Once you've selected the Source and Target branches, click Compare branches and continue. You should see an entry similar to:
New Merge Request

From test-branch into release-13-0
An entry like this confirms that your MR will not merge into master.
-
Make any additional changes in the New Merge Request screen, and click Submit merge request.
-
In the new merge request, look for Request to merge. You'll see an entry similar to:
Request to merge test-branch into release-13-0That confirms you've set up the MR to merge into the specified branch, not master.
-
Proceed with the change as you would with any other MR.
-
When your MR is approved, and an appropriate user merges that MR, you can rest assured that your work is incorporated directly into the feature branch. When the feature branch is ready, it can then be merged into master.