Migration guide from Git Annex to Git LFS (FREE)
WARNING: Git Annex support has been removed in GitLab Enterprise Edition 9.0 (2017/03/22).
Both Git Annex and Git LFS are tools to manage large files in Git.
History
Git Annex was introduced in GitLab Enterprise Edition 7.8, at a time where Git LFS didn't yet exist. A few months later, GitLab brought support for Git LFS in GitLab 8.2 and is available for both Community and Enterprise editions.
Differences between Git Annex and Git LFS
Some items below are general differences between the two protocols and some are ones that GitLab developed.
- Git Annex works only through SSH, whereas Git LFS works both with SSH and HTTPS (SSH support was added in GitLab 8.12).
- Annex files are stored in a sub-directory of the normal repositories, whereas LFS files are stored outside of the repositories in a place you can define.
- Git Annex requires a more complex setup, but has much more options than Git
LFS. You can compare the commands each one offers by running
man git-annexandman git-lfs. - Annex files cannot be browsed directly in the GitLab interface, whereas LFS files can.
Migration steps
Git Annex files are stored in a sub-directory of the normal repositories
(.git/annex/objects) and LFS files are stored outside of the repositories.
The two aren't compatible as they are using a different scheme. Therefore, the
migration has to be done manually per repository.
There are basically two steps you need to take in order to migrate from Git Annex to Git LFS.
TL; DR
If you know what you are doing and want to skip the reading, this is what you need to do (we assume you have git-annex enabled in your repository and that you have made backups in case something goes wrong). Fire up a terminal, navigate to your Git repository and:
-
Disable
git-annex:git annex sync --content git annex direct git annex uninit git annex indirect -
Enable
git-lfs:git lfs install git lfs track <files> git add . git commit -m "commit message" git push
Disabling Git Annex in your repository
Before changing anything, make sure you have a backup of your repository first. There are a couple of ways to do that, but you can clone it to another local path and maybe push it to GitLab if you want a remote backup as well. A guide on how to back up a git-annex repository to an external hard drive is also available.
Because Annex files are stored as objects with symlinks and cannot be directly modified, we need to first remove those symlinks.
NOTE:
Make sure the you read about the direct mode as it contains
information that may fit in your use case. The annex direct command is
deprecated in Git Annex version 6, so you may need to upgrade your repository
if the server also has Git Annex 6 installed. Read more in the
Git Annex troubleshooting tips section.
-
Backup your repository
cd repository git annex sync --content cd .. git clone repository repository-backup cd repository-backup git annex get cd .. -
Use
annex direct:cd repository git annex directThe output should be similar to this:
commit On branch master Your branch is up-to-date with 'origin/master'. nothing to commit, working tree clean ok direct debian.iso ok direct ok -
Disable Git Annex with
annex uninit:git annex uninitThe output should be similar to this:
unannex debian.iso ok
Deleted branch git-annex (was 2534d2c).
This command runs
unannexon every file in the repository, leaving the original files. -
Switch back to
indirectmode:git annex indirectThe output should be similar to this:
(merging origin/git-annex into git-annex...)
(recording state in git...)
commit  (recording state in git...)

ok
(recording state in git...)
[master fac3194] commit before switching to indirect mode
 1 file changed, 1 deletion(-)
 delete mode 120000 alpine-virt-3.4.4-x86_64.iso
ok
indirect  ok
ok
At this point, you have two options. Either add, commit and push the files directly back to GitLab or switch to Git LFS. The LFS switch is described in the next section.
Enabling Git LFS in your repository
Git LFS is enabled by default on all GitLab products (GitLab CE, GitLab EE, GitLab.com), therefore, you don't need to do anything server-side.
-
First, make sure you have
git-lfsinstalled locally:git lfs helpIf the terminal doesn't prompt you with a full response on
git-lfscommands, install the Git LFS client first. -
Inside the repository, run the following command to initiate LFS:
git lfs install -
Enable
git-lfsfor the group of files you want to track. You can track specific files, all files containing the same extension, or an entire directory:git lfs track images/01.png # per file git lfs track **/*.png # per extension git lfs track images/ # per directoryAfter this, run
git statusto see the.gitattributesadded to your repository. It collects all file patterns that you chose to track viagit-lfs. -
Add the files, commit and push them to GitLab:
git add .
git commit -m "commit message"
git push
If your remote is set up with HTTP, you are asked to enter your login credentials. If you have 2FA enabled, make sure to use a personal access token instead of your password.
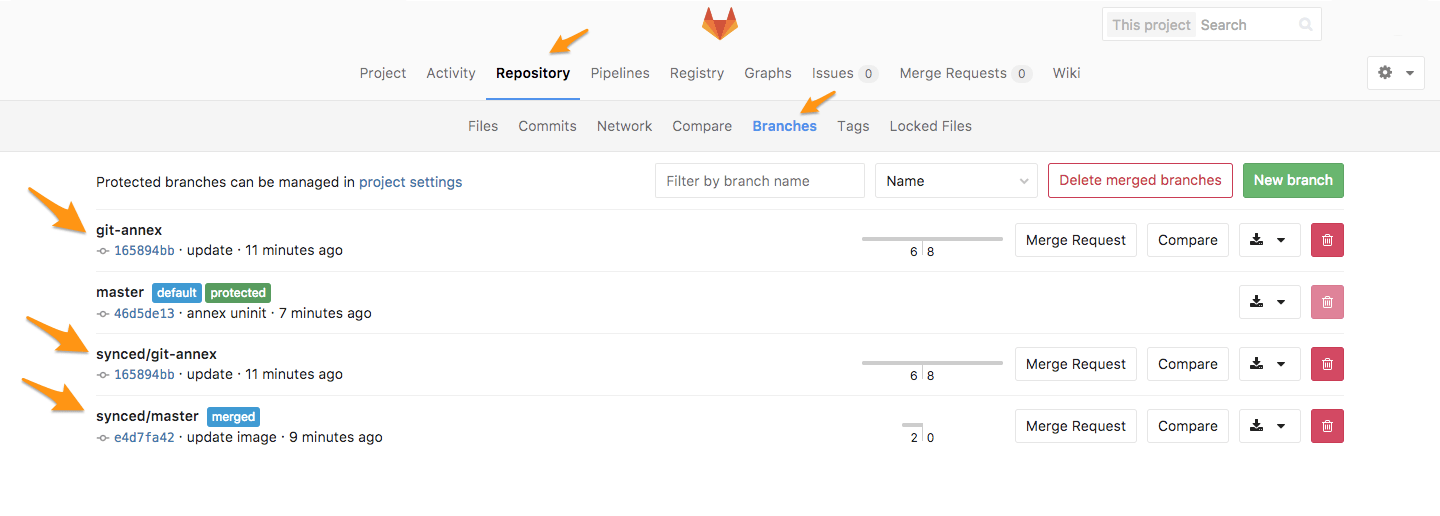
Removing the Git Annex branches
After the migration finishes successfully, you can remove all git-annex
related branches from your repository.
On GitLab, navigate to your project's Repository > Branches and delete all
branches created by Git Annex: git-annex, and all under synced/.
You can also do this on the command line with:
git branch -d synced/master
git branch -d synced/git-annex
git push origin :synced/master
git push origin :synced/git-annex
git push origin :git-annex
git remote prune origin
If there are still some Annex objects inside your repository (.git/annex/)
or references inside .git/config, run annex uninit again:
git annex uninitFurther Reading
- (Blog Post) Getting Started with Git FLS
- (Blog Post) Announcing LFS Support in GitLab
- (Blog Post) GitLab Annex Solves the Problem of Versioning Large Binaries with Git
- Git Annex
- Git LFS