GitLab Admin Area (FREE SELF)
The Admin Area provides a web UI for administering some features of GitLab self-managed instances.
To access the Admin Area, either:
- Click the Admin Area icon ({admin}).
- Visit
/adminon your self-managed instance.
NOTE: Only admin users can access the Admin Area.
Admin Area sections
The Admin Area is made up of the following sections:
| Section | Description |
|---|---|
| {overview} Overview | View your GitLab Dashboard, and administer projects, users, groups, jobs, runners, and Gitaly servers. |
| {monitor} Monitoring | View GitLab system information, and information on background jobs, logs, health checks, requests profiles, and audit events. |
| {messages} Messages | Send and manage broadcast messages for your users. |
| {hook} System Hooks | Configure system hooks for many events. |
| {applications} Applications | Create system OAuth applications for integrations with other services. |
| {slight-frown} Abuse Reports | Manage abuse reports submitted by your users. |
| {license} License (STARTER ONLY) | Upload, display, and remove licenses. |
| {cloud-gear} Kubernetes | Create and manage instance-level Kubernetes clusters. |
| {push-rules} Push rules (STARTER ONLY) | Configure pre-defined Git push rules for projects. Also, configure merge requests approvers rules. (PREMIUM SELF) |
| {location-dot} Geo (PREMIUM SELF) | Configure and maintain Geo nodes. |
| {key} Deploy keys | Create instance-wide SSH deploy keys. |
| {lock} Credentials (ULTIMATE SELF) | View credentials that can be used to access your instance. |
| {template} Service Templates | Create service templates for projects. |
| {labels} Labels | Create and maintain labels for your GitLab instance. |
| {appearance} Appearance | Customize GitLab appearance. |
| {settings} Settings | Modify the settings for your GitLab instance. |
Admin Dashboard
The Dashboard provides statistics and system information about the GitLab instance.
To access the Dashboard, either:
- Click the Admin Area icon ({admin}).
- Visit
/adminon your self-managed instance.
The Dashboard is the default view of the Admin Area, and is made up of the following sections:
| Section | Description |
|---|---|
| Projects | The total number of projects, up to 10 of the latest projects, and the option of creating a new project. |
| Users | The total number of users, up to 10 of the latest users, the option of creating a new user, and a link to Users statistics. |
| Groups | The total number of groups, up to 10 of the latest groups, and the option of creating a new group. |
| Statistics | Totals of all elements of the GitLab instance. |
| Features | All features available on the GitLab instance. Enabled features are marked with a green circle icon, and disabled features are marked with a power icon. |
| Components | The major components of GitLab and the version number of each. A link to the Gitaly Servers is also included. |
Overview section
The following topics document the Overview section of the Admin Area.
Administering Projects
You can administer all projects in the GitLab instance from the Admin Area's Projects page.
To access the Projects page, go to Admin Area > Overview > Projects.
Click the All, Private, Internal, or Public tab to list only projects of that criteria.
By default, all projects are listed, in reverse order of when they were last updated. For each project, the following information is listed:
- Name.
- Namespace.
- Description.
- Size, updated every 15 minutes at most.
Projects can be edited or deleted.
The list of projects can be sorted by:
- Name.
- Last created.
- Oldest created.
- Last updated.
- Oldest updated.
- Owner.
A user can choose to hide or show archived projects in the list.
In the Filter by name field, type the project name you want to find, and GitLab filters them as you type.
Select from the Namespace dropdown to filter only projects in that namespace.
You can combine the filter options. For example, to list only public projects with score in their name:
- Click the Public tab.
- Enter
scorein the Filter by name... input box.
Administering Users
You can administer all users in the GitLab instance from the Admin Area's Users page.
To access the Users page, go to Admin Area > Overview > Users.
To list users matching a specific criteria, click on one of the following tabs on the Users page:
- Active
- Admins
- 2FA Enabled
- 2FA Disabled
- External
- Blocked
- Deactivated
- Without projects
For each user, the following are listed:
- Username
- Email address
- Project membership count
- Date of account creation
- Date of last activity
To edit a user, click the Edit button in that user's row. To delete the user, or delete the user and their contributions, click the cog dropdown in that user's row, and select the desired option.
To change the sort order:
- Click the sort dropdown.
- Select the desired order.
By default the sort dropdown shows Name.
To search for users, enter your criteria in the search field. The user search is case insensitive, and applies partial matching to name and username. To search for an email address, you must provide the complete email address.
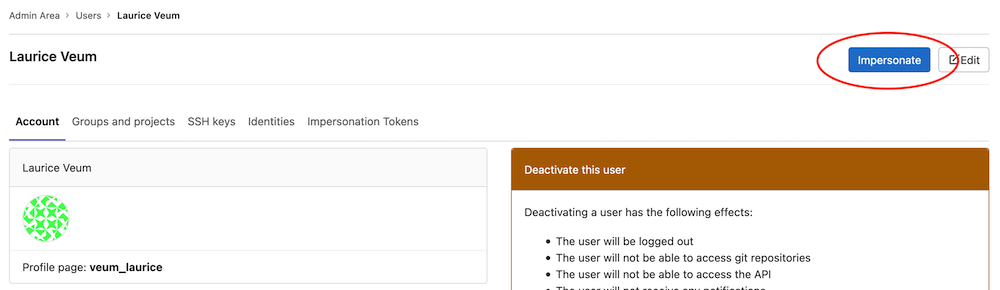
User impersonation
An administrator can "impersonate" any other user, including other administrator users. This allows the administrator to "see what the user sees," and take actions on behalf of the user. You can impersonate a user in the following ways:
- Through the UI, by selecting Admin Area > Overview > Users > Select a user > Impersonate.
- With the API, using impersonation tokens.
All impersonation activities are captured with audit events.
Users statistics
The Users statistics page provides an overview of user accounts by role. These statistics are calculated daily, so user changes made since the last update are not reflected.
The following totals are also included:
- Billable users
- Blocked users
- Total users
GitLab billing is based on the number of Billable users.
Administering Groups
You can administer all groups in the GitLab instance from the Admin Area's Groups page.
To access the Groups page, go to Admin Area > Overview > Groups.
For each group, the page displays their name, description, size, number of projects in the group, number of members, and whether the group is private, internal, or public. To edit a group, click the Edit button in that group's row. To delete the group, click the Delete button in that group's row.
To change the sort order, click the sort dropdown and select the desired order. The default sort order is by Last created.
To search for groups by name, enter your criteria in the search field. The group search is case insensitive, and applies partial matching.
To Create a new group click New group.
Administering Jobs
You can administer all jobs in the GitLab instance from the Admin Area's Jobs page.
To access the Jobs page, go to Admin Area > Overview > Jobs.
All jobs are listed, in descending order of job ID.
Click the All tab to list all jobs. Click the Pending, Running, or Finished tab to list only jobs of that status.
For each job, the following details are listed:
| Field | Description |
|---|---|
| Status | Job status, either passed, skipped, or failed. |
| Job | Includes links to the job, branch, and the commit that started the job. |
| Pipeline | Includes a link to the specific pipeline. |
| Project | Name of the project, and organization, to which the job belongs. |
| Runner | Name of the CI runner assigned to execute the job. |
| Stage | Stage that the job is declared in a .gitlab-ci.yml file. |
| Name | Name of the job specified in a .gitlab-ci.yml file. |
| Timing | Duration of the job, and how long ago the job completed. |
| Coverage | Percentage of tests coverage. |
Administering runners
You can administer all runners in the GitLab instance from the Admin Area's Runners page. See GitLab Runner for more information.
To access the Runners page, go to Admin Area > Overview > Runners.
The Runners page features:
- A description of runners and their possible states.
- Instructions on installing a runner.
- A list of all registered runners.
Runners are listed in descending order by the date they were created, by default. You can change the sort order to Last Contacted from the dropdown beside the search field.
To search runners' descriptions:
- In the Search or filter results... field, type the description of the runner you want to find.
- Press Enter.
You can also filter runners by status, type, and tag. To filter:
- Click in the Search or filter results... field.
- Select status:, type:, or tag:.
- Select or enter your search criteria.

For each runner, the following attributes are listed:
| Attribute | Description |
|---|---|
| Type | One or more of the following states: shared, group, specific, locked, or paused |
| Runner token | Token used to identify the runner, and which the runner uses to communicate with the GitLab instance |
| Description | Description given to the runner when it was created |
| Version | GitLab Runner version |
| IP address | IP address of the host on which the runner is registered |
| Projects | Projects to which the runner is assigned |
| Jobs | Total of jobs run by the runner |
| Tags | Tags associated with the runner |
| Last contact | Timestamp indicating when the runner last contacted the GitLab instance |
You can also edit, pause, or remove each runner.
Administering Gitaly servers
You can list all Gitaly servers in the GitLab instance from the Admin Area's Gitaly Servers page. For more details, see Gitaly.
To access the Gitaly Servers page, go to Admin Area > Overview > Gitaly Servers.
For each Gitaly server, the following details are listed:
| Field | Description |
|---|---|
| Storage | Repository storage |
| Address | Network address on which the Gitaly server is listening |
| Server version | Gitaly version |
| Git version | Version of Git installed on the Gitaly server |
| Up to date | Indicates if the Gitaly server version is the latest version available. A green dot indicates the server is up to date. |
Monitoring section
The following topics document the Monitoring section of the Admin Area.
System Information
The System Info page provides the following statistics:
| Field | Description |
|---|---|
| CPU | Number of CPU cores available |
| Memory Usage | Memory in use, and total memory available |
| Disk Usage | Disk space in use, and total disk space available |
| Uptime | Approximate uptime of the GitLab instance |
These statistics are updated only when you navigate to the System Info page, or you refresh the page in your browser.
Background Jobs
The Background Jobs page displays the Sidekiq dashboard. Sidekiq is used by GitLab to perform processing in the background.
The Sidekiq dashboard consists of the following elements:
- A tab per jobs' status.
- A breakdown of background job statistics.
- A live graph of Processed and Failed jobs, with a selectable polling interval.
- An historical graph of Processed and Failed jobs, with a selectable time span.
- Redis statistics, including:
- Version number
- Uptime, measured in days
- Number of connections
- Current memory usage, measured in MB
- Peak memory usage, measured in MB
Logs
Since GitLab 13.0, Log view has been removed from the admin dashboard since the logging does not work in multi-node setups and could cause confusion for administrators by displaying partial information.
For multi-node systems we recommend ingesting the logs into services like Elasticsearch and Splunk.
| Log file | Contents |
|---|---|
application.log |
GitLab user activity |
git_json.log |
Failed GitLab interaction with Git repositories |
production.log |
Requests received from Unicorn, and the actions taken to serve those requests |
sidekiq.log |
Background jobs |
repocheck.log |
Repository activity |
integrations_json.log |
Activity between GitLab and integrated systems |
kubernetes.log |
Kubernetes activity |
The contents of these log files can be useful when troubleshooting a problem.
For details of these log files and their contents, see Log system.
The content of each log file is listed in chronological order. To minimize performance issues, a maximum 2000 lines of each log file are shown.
Requests Profiles
The Requests Profiles page contains the token required for profiling. For more details, see Request Profiling.
Audit Events (PREMIUM SELF)
The Audit Events page lists changes made within the GitLab server. With this information you can control, analyze, and track every change.