Group Import/Export
- Introduced in GitLab 13.0 as an experimental feature. May change in future releases.
Existing groups running on any GitLab instance or GitLab.com can be exported with all their related data and moved to a new GitLab instance.
The GitLab import/export button is displayed if the group import option in enabled.
See also:
To enable GitLab import/export:
- Navigate to Admin Area > Settings > Visibility and access controls.
- Scroll to Import sources
- Enable desired Import sources
Important Notes
Note the following:
- Exports are stored in a temporary shared directory and are deleted every 24 hours by a specific worker.
- To preserve group-level relationships from imported projects, run the Group Import/Export first, to allow projects to be imported into the desired group structure.
- Imported groups are given a
privatevisibility level, unless imported into a parent group. - If imported into a parent group, a subgroup inherits the same level of visibility unless otherwise restricted.
- To preserve the member list and their respective permissions on imported groups, review the users in these groups. Make sure these users exist before importing the desired groups.
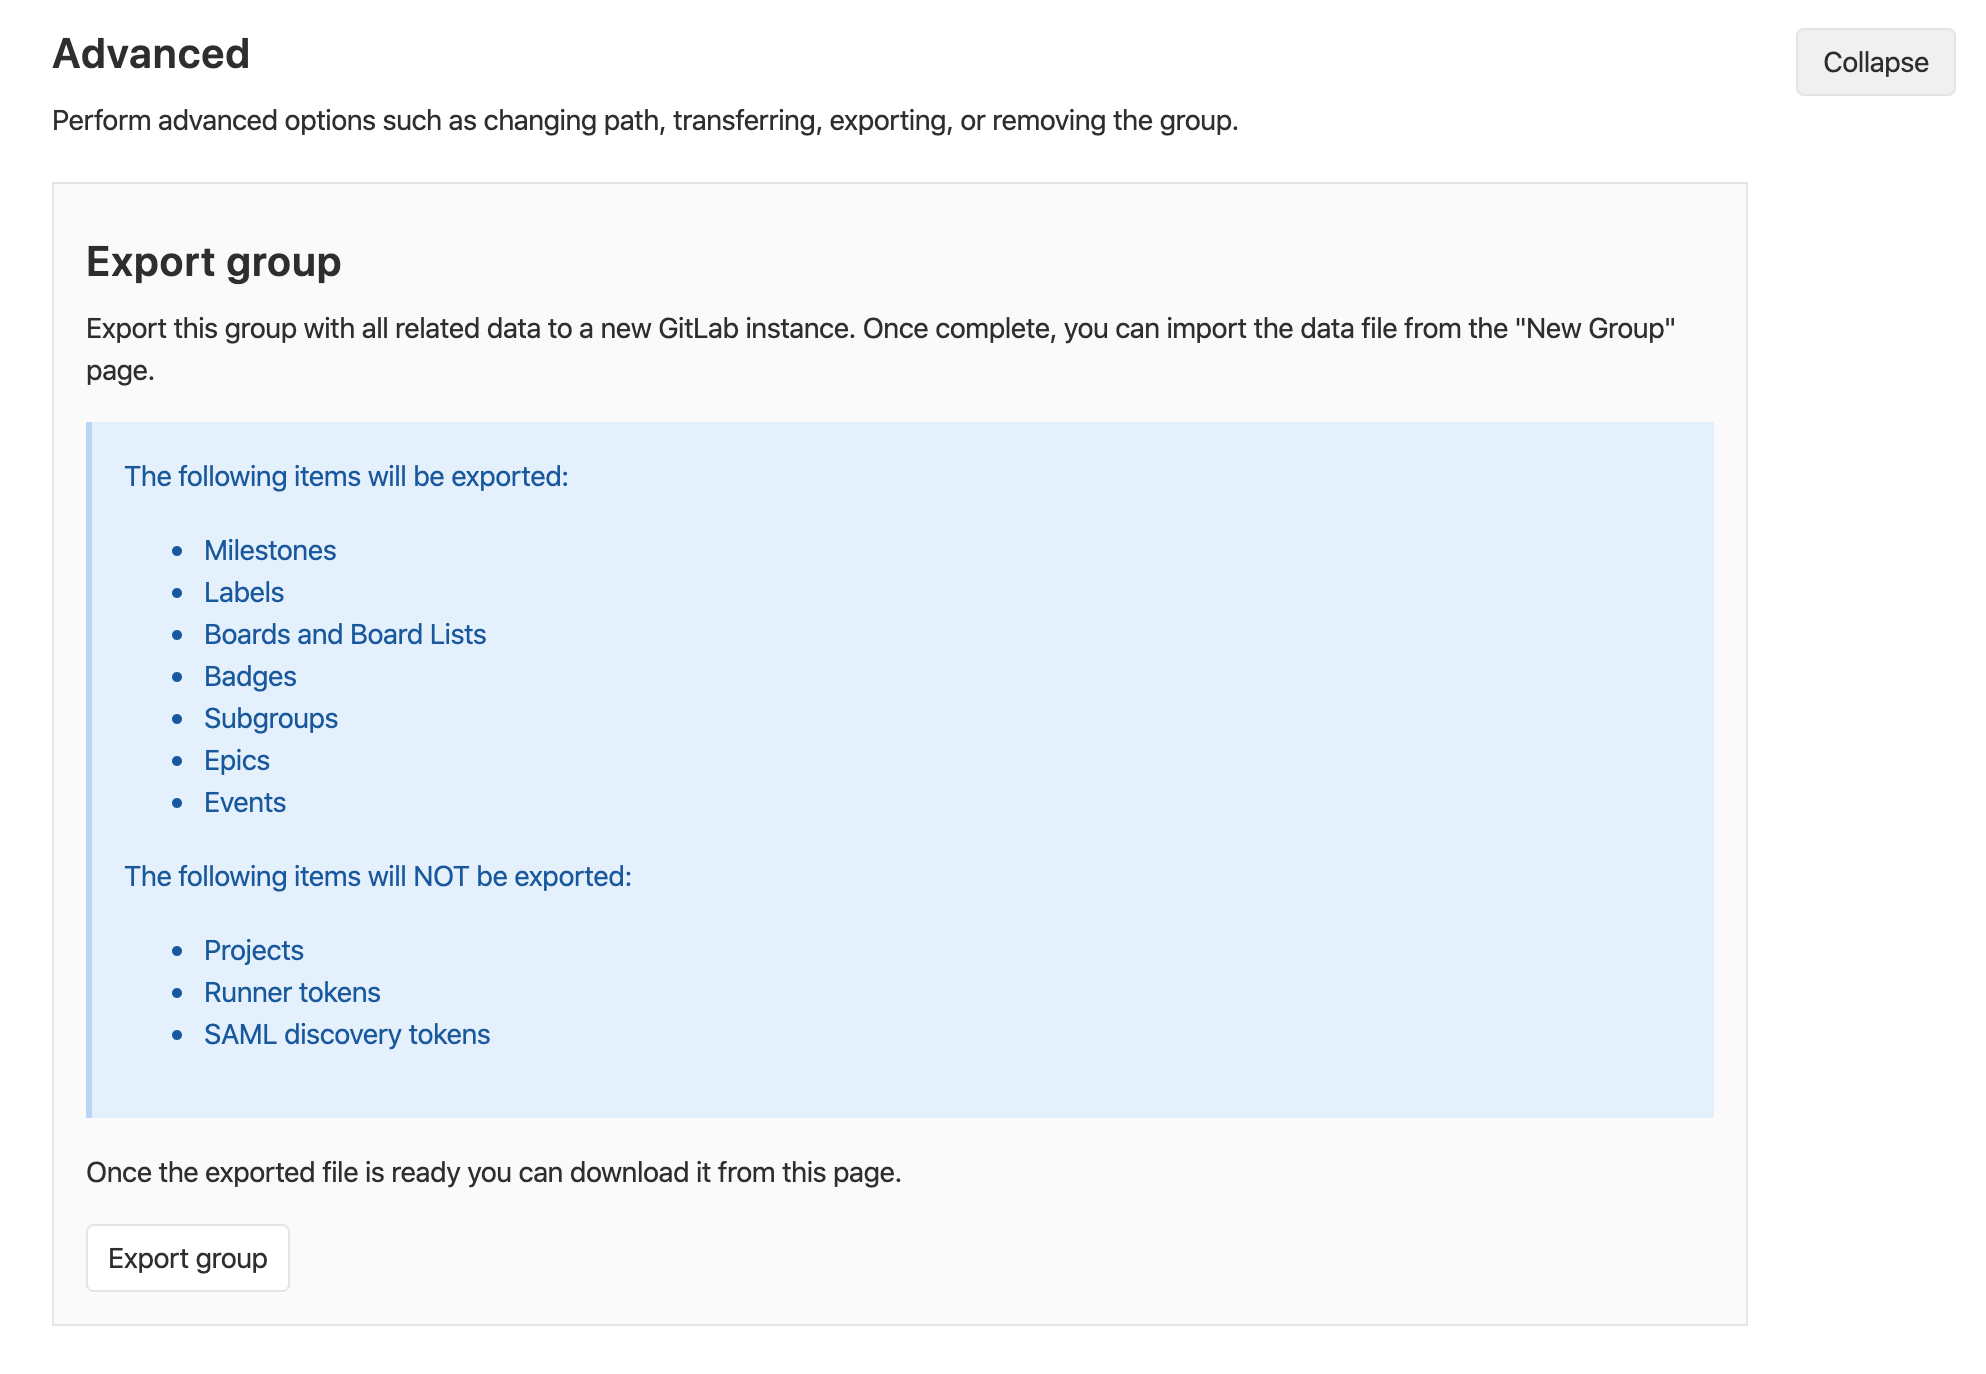
Exported Contents
The following items are exported:
- Milestones
- Labels
- Boards and Board Lists
- Badges
- Subgroups (including all the aforementioned data)
- Epics
- Events
- Wikis (PREMIUM SELF) (Introduced in GitLab 13.9)
The following items are not exported:
- Projects
- Runner tokens
- SAML discovery tokens
NOTE:
For more details on the specific data persisted in a group export, see the
import_export.yml file.
Exporting a Group
-
Navigate to your group's homepage.
-
Click Settings in the sidebar.
-
In the Advanced section, click the Export Group button.

-
After the export is generated, you should receive an e-mail with a link to the exported contents in a compressed tar archive, with contents in JSON format.
-
Alternatively, you can come back to the project settings and download the file from there by clicking Download export, or generate a new file by clicking Regenerate export.
NOTE:
The maximum import file size can be set by the Administrator, default is 0 (unlimited).
As an administrator, you can modify the maximum import file size. To do so, use the max_import_size option in the Application settings API or the Admin UI. Default modified from 50MB to 0 in GitLab 13.8.
Between CE and EE
You can export groups from the Community Edition to the Enterprise Edition and vice versa.
The Enterprise Edition retains some group data that isn't part of the Community Edition. If you're exporting a group from the Enterprise Edition to the Community Edition, you may lose this data. For more information, see downgrading from EE to CE.
Importing the group
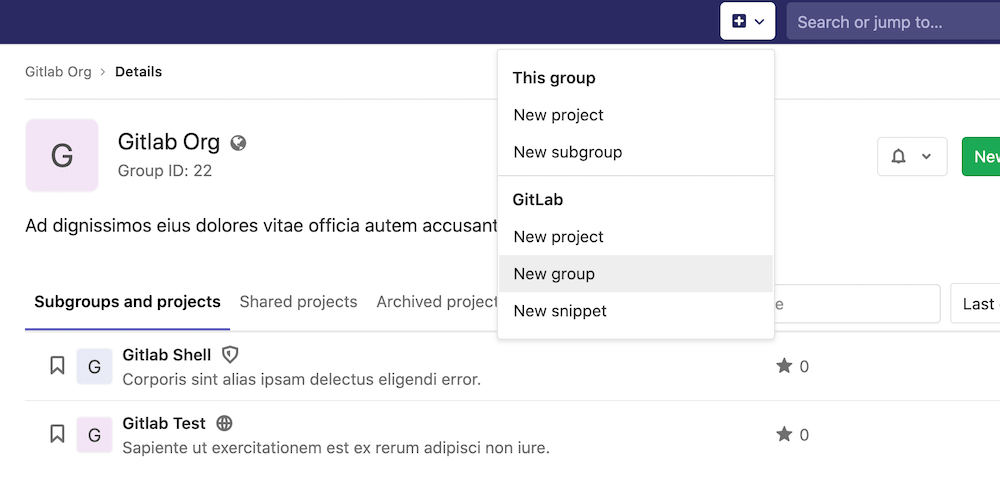
-
Navigate to the New Group page, either via the
+button in the top navigation bar, or the New subgroup button on an existing group's page. -
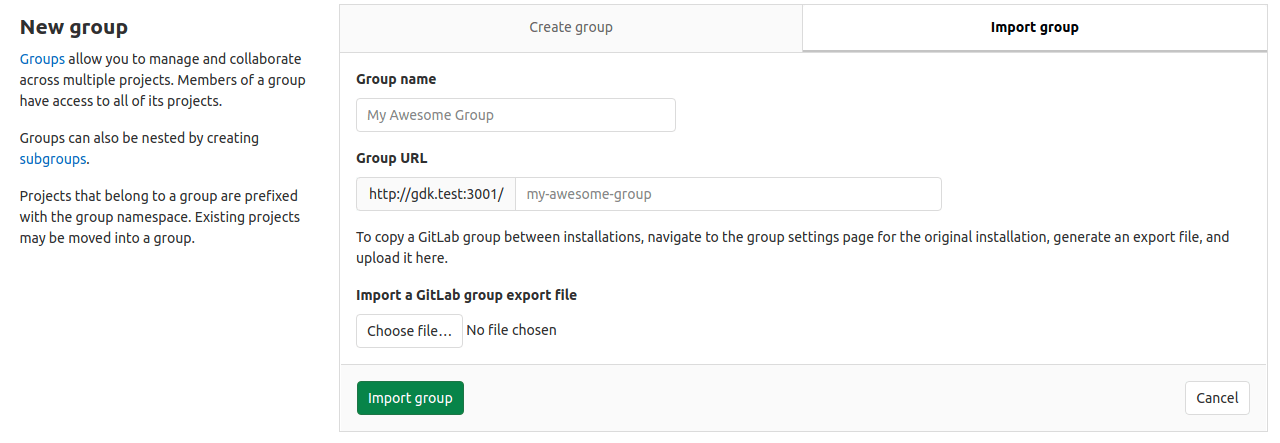
On the New Group page, select the Import group tab.
-
Enter your group name.
-
Accept or modify the associated group URL.
-
Click Choose file
-
Select the file that you exported in the exporting a group section.
-
Click Import group to begin importing. Your newly imported group page appears after the operation completes.
Version history
GitLab can import bundles that were exported from a different GitLab deployment. This ability is limited to two previous GitLab minor releases, which is similar to our process for Security Releases.
For example:
| Current version | Can import bundles exported from |
|---|---|
| 13.0 | 13.0, 12.10, 12.9 |
| 13.1 | 13.1, 13.0, 12.10 |
Rate Limits
To help avoid abuse, by default, users are rate limited to:
| Request Type | Limit |
|---|---|
| Export | 6 groups per minute |
| Download export | 1 download per group per minute |
| Import | 6 groups per minute |
Please note that GitLab.com may have different settings from the defaults.